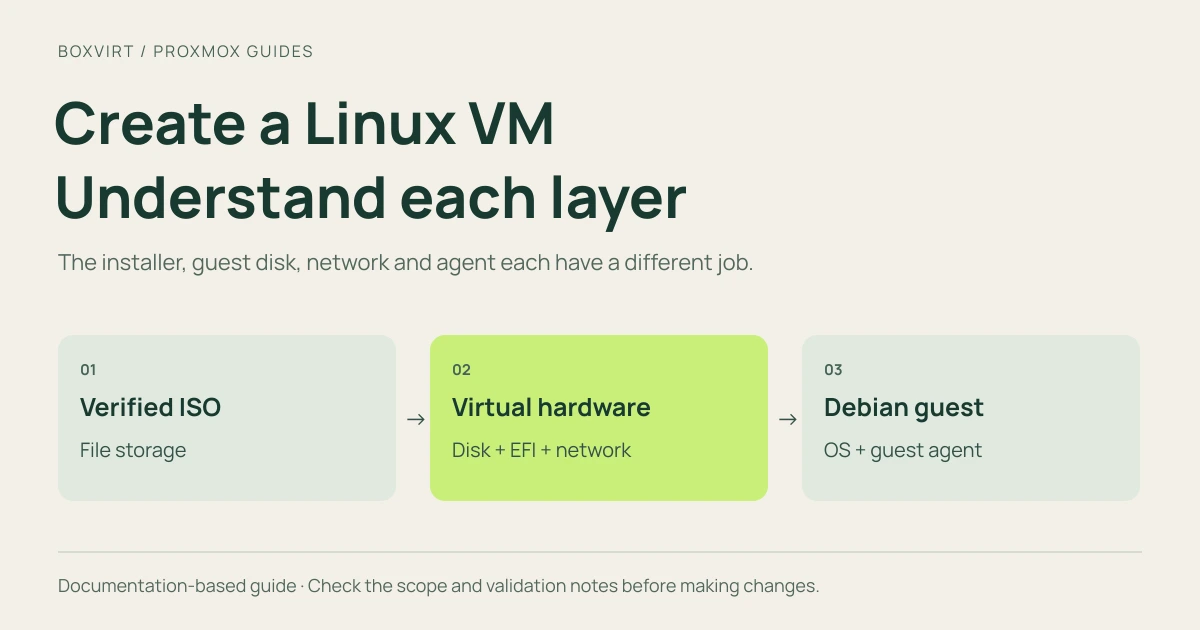
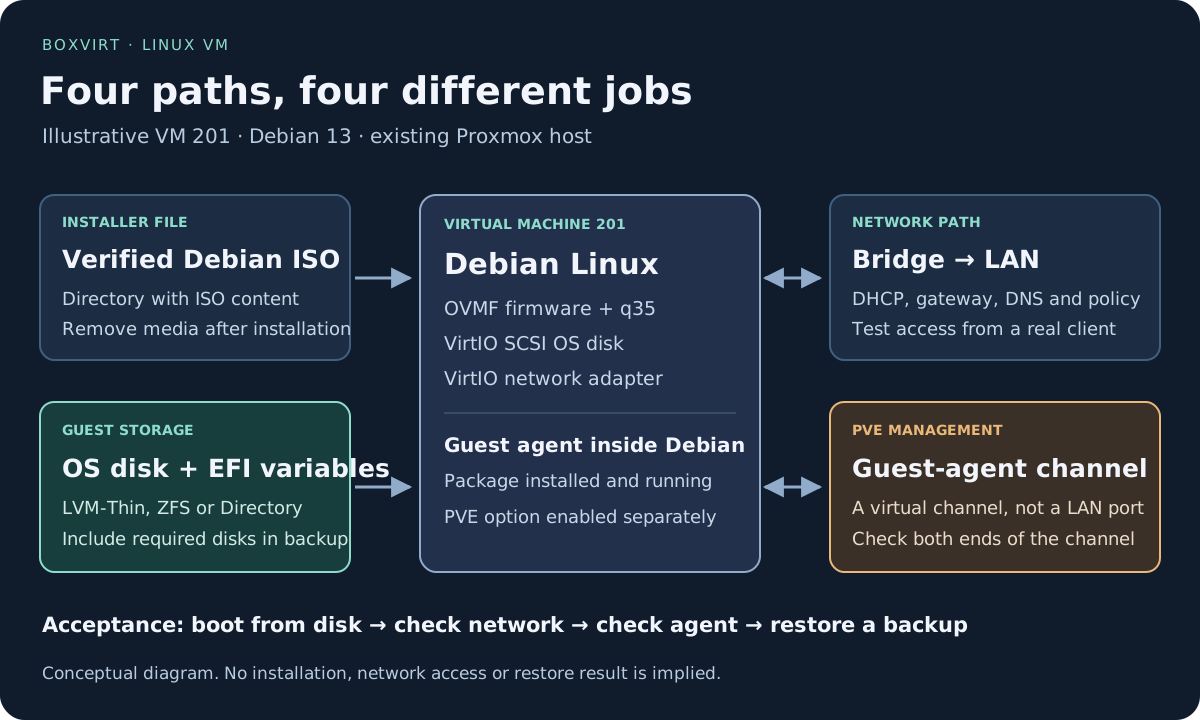
To create a Linux VM in Proxmox, upload a verified installer ISO, create a virtual disk on suitable guest storage, and connect a VirtIO network adapter to the intended bridge. Install Linux through the VM console, remove the installer ISO, then enable and check the QEMU Guest Agent on both sides.
The useful result is a VM that starts from its own disk, reaches the right network and can be recovered. Choosing every setting for maximum performance before that basic path works makes troubleshooting harder.
This guide uses Debian 13 on an existing x86-64 Proxmox VE host. Debian’s release page identifies Debian 13.7 as the current point release on November 8, 2026. Download the supported image available when you perform the installation and record its exact filename.
Validation: this guide was checked against the documentation. The Proxmox QEMU manual checked identifies itself as version 9.2.13. No installation or restore was performed for this article, so the examples are an installation plan, not measured results from a lab.
Plan one VM before opening the wizard
This walkthrough starts after Proxmox installation. You need working host management, enough available CPU and RAM, a guest-disk storage entry and a bridge connected to a network with DHCP and outbound package access. Use an existing network; do not reconfigure the host’s management bridge while creating the first VM.
Here is the illustrative configuration used throughout:
| Setting | Example | Reason or limit |
|---|---|---|
| VM ID and name | 201, debian-service | Check the ID is unused; substitute your own everywhere below |
| Installer | Debian 13 amd64 netinst ISO | A small installer that needs network access for additional packages |
| Firmware and machine | OVMF / UEFI, q35 | A consistent firmware choice for this new VM |
| Firmware variables | New 4 MiB EFI disk | Stores virtual firmware settings; separate from the OS disk |
| OS disk | 32 GiB, SCSI, on local-lvm | Illustrative capacity, not a service sizing recommendation |
| CPU | One socket, two cores, type host | Example for one host; review compatibility before migration |
| Memory | 4096 MiB, fixed allocation | An explicit starting budget, not a minimum for every Linux service |
| Network | VirtIO NIC, existing vmbr0, no VLAN tag | Assumes this bridge already reaches the intended untagged LAN |
| Guest OS | Debian without a desktop | A small server baseline; applications need their own resource plan |
The storage IDs and bridge name are examples, not special names that every installation must use. Check their actual backend and physical network path. If you are still choosing between a VM and a container, use the VM or LXC decision guide first.
1. Verify the installer and upload it to ISO storage
Download the amd64 netinst image from
Debian’s official image directory.
At the documentation check date, its filename was
debian-13.7.0-amd64-netinst.iso. Do not use that filename as proof of
authenticity.
On your workstation, verify the signature on the accompanying checksum file with a trusted Debian signing key, then check the ISO against that checksum. Debian’s verification instructions explain both steps. A matching hash from an untrusted source does not establish who produced the image. Keep the image filename and verification result in your installation notes.
In Proxmox, select a storage entry that permits ISO images, then open its
ISO Images view and upload the verified file. An installer-created Directory
entry named local often serves this purpose, but confirm its content types.
local-lvm normally refers to an LVM-Thin entry for guest disks. It is not
an ISO library. Likewise, a local ZFS zfspool entry is a guest-volume backend.
The Proxmox storage comparison explains why
one host can use separate entries for installer files and virtual disks.
2. Create the virtual hardware
Choose Create VM in the Proxmox interface. Select the intended node, an unused VM ID and a descriptive name. Choose the uploaded Debian ISO and the appropriate Linux guest OS type. The following sections explain the settings that most affect this example; labels may vary with the installed PVE build.
Firmware: keep UEFI and its variables together
Select q35 and OVMF (UEFI) for this new VM. Add an EFI disk on guest
storage and use the current 4 MiB EFI type. Keep the EFI disk with the VM’s
recovery plan, because it stores firmware variables such as boot entries.
The PVE EFI disk is not Debian’s EFI System Partition. Debian creates its own partitions inside the 32 GiB virtual OS disk during installation. You need both layers when using this design.
For an official Debian installer with its signed boot chain, retain pre-enrolled keys and the corresponding Secure Boot setting. Verify this combination with the selected installer and PVE firmware build. Pre-enrolling keys enables Secure Boot by default; UEFI alone does not mean Secure Boot is active. Custom kernels or unsigned modules require a separate signing and trust plan.
The PVE firmware documentation describes these options. Keep the firmware mode consistent after installation: changing an installed VM from UEFI to legacy BIOS is not a routine tuning step.
Disk: separate size, format and controller
Put the OS disk on the selected guest storage, not wherever the ISO happens
to be. In this example that is a 32 GiB disk on local-lvm, attached as SCSI
with VirtIO SCSI single and IO Thread enabled.
These are different decisions:
- Size is the capacity visible to Debian. The application, logs, updates and any local data must fit inside it.
- Backend determines how Proxmox stores the disk. LVM-Thin exposes a block volume; a Directory backend can store an image file.
- Controller determines the virtual interface through which Linux accesses the disk. Current Debian includes the drivers for VirtIO SCSI.
Do not expect a qcow2 format selector on every backend. Keep the compatible format offered by the selected storage and leave cache mode at its default for this baseline. A cache-mode change needs a durability and storage review, not a claim that one setting is universally fastest.
Enable Discard only as part of a supported end-to-end reclamation path: guest filesystem and block stack, virtual disk option and underlying backend. It is useful with thin-provisioned storage, but deleting a guest file does not promise an immediate decrease in host usage. Snapshots and other retained references can still hold blocks. SSD Emulation describes the virtual device; it does not turn the host’s physical disks into SSDs.
See the PVE disk options for controller, cache and discard details. Do not disable the disk’s Backup option for the OS disk in this example.
CPU and RAM: give the example a real budget
For this one-host example, choose one socket and two cores with CPU type
host. It exposes the host’s CPU features to the guest. If you intend to
move the VM to different hardware, choose and test a CPU model that the
destination supports instead; a successful boot today does not establish
live-migration compatibility.
Set memory and minimum memory to 4096 MiB for fixed allocation. Leave the ballooning device enabled so PVE can obtain the information it supports. Fixed allocation and removal of the balloon device are different choices. Setting a lower minimum enables dynamic allocation and needs a separate resource plan.
The host still needs memory for its own services, storage and VM overhead. Use the RAM planning worksheet rather than assuming allocated guest RAM can exceed the machine’s capacity without consequences. The CPU and memory behavior is documented in PVE’s QEMU chapter.
Network: use the bridge you intended
Select a VirtIO NIC connected to vmbr0 in this example. Leave the VLAN
tag unset only because the example bridge already reaches the chosen untagged
LAN. A different network design may require a tag and a correctly configured
switch trunk; this guide does not establish those prerequisites.
Record the generated MAC address. It lets you identify the VM’s DHCP lease and later create a reservation. Accept the default MTU for this known network path rather than introducing jumbo frames during installation.
Respect the firewall policy already protecting the guest network and PVE host. A bridge is connectivity, not an access policy. Do not remove firewall rules to make the installer work. For the underlying path, refer to Proxmox bridges and VLANs. The firewall setup guide explains the separate host and guest policy switches.
Enable the QEMU Guest Agent option before the VM’s first start, since we will install the agent inside Debian. Then review the hardware summary and create the VM. This option alone does not install any guest software.
3. Install Debian onto the new virtual disk
Start the VM and open its console. Boot the Debian installer from the ISO. Follow the Debian installation guide for locale, keyboard, network, accounts and partitioning.
For the example:
- Let the installer request DHCP on the VirtIO NIC. Check the assigned address, gateway and DNS belong to the intended network.
- Set a unique hostname such as
debian-service. For this walkthrough, leave the root password blank and create the first administrative user. Debian disables direct root-password login on this path and gives that first user sudo access, matching the guest commands below. Keep the console available while checking login. - Use guided partitioning on the new 32 GiB virtual disk, with the simple “all files in one partition” layout for this example. Confirm the selected disk and proposed changes before writing them.
- Choose a Debian package mirror and install a small server system without a desktop. Select SSH server only if it belongs in your access plan. Standard system utilities are useful for the baseline.
- Finish installation and install the bootloader as directed by the installer.
The partitioner writes to the disk presented inside this VM. If an unexpected disk appears, stop and inspect the VM hardware before confirming any erase operation. No physical-disk passthrough is part of this example.
After installation, remove the ISO from the virtual CD/DVD drive and check the VM boot order favors the installed OS disk. Reboot and confirm Debian starts without the installer. Keep the empty virtual CD/DVD device if you want it for future recovery media.
4. Update Debian and connect the guest agent
The following commands run inside the Debian VM, as the administrative user created during installation. They do not run in the Proxmox host shell.
Refresh the package index first:
sudo apt update
Resolve package-source or network errors before continuing. Then install available guest updates, reviewing the proposed transaction:
sudo apt full-upgrade
Install the guest-side agent from Debian’s repositories:
sudo apt install qemu-guest-agent
The Debian package description confirms that this package belongs inside the QEMU guest. It communicates over a virtual channel, not through a newly opened LAN port.
Start the installed service if needed, then check it:
sudo systemctl start qemu-guest-agent
systemctl is-active qemu-guest-agent
Expect an active service. If it fails, inspect the guest’s service status and the PVE guest-agent option before changing networking; the channel is separate from the VM’s IP connectivity.
If you enabled the PVE option after the VM was already running, shut down Debian cleanly and perform a full VM stop/start. A reboot inside Debian does not necessarily recreate virtual hardware. The PVE guest-agent section requires a fresh start for that option to take effect.
After starting the VM again, confirm the agent is active in Debian. In PVE, check that guest-agent information becomes available, such as the reported IP addresses. Those addresses are observations, not proof that your client can reach the guest.
5. Check boot, networking and maintenance separately
Run these read-only commands inside Debian and save their output:
cat /etc/os-release
uname -r
lsblk -f
findmnt /
df -h /
free -h
ip -br address
ip route
getent hosts deb.debian.org
Compare the disk size, filesystem, address and default route with your plan.
The guest interface might be named ens18, but use the name Debian actually
reports. If your network uses IPv6, check its addresses and ip -6 route too.
| Check | What success means |
|---|---|
| Boot without ISO | Debian reaches its login prompt from the installed virtual disk |
| Console login | The administrative account works and can use sudo |
| Guest storage | Root filesystem has the expected layout and enough free space |
| Network | Guest receives the intended lease and can use required network services |
| DNS | The configured resolver can resolve an external package hostname |
| Guest agent | Service is active and PVE can communicate with it after a fresh start |
| Shutdown/start | A clean PVE shutdown and subsequent start work as intended |
| Recovery | An isolated restored copy boots and the needed data can be read |
Test remote access from an allowed administrator device if you installed SSH. A successful outbound package download does not prove that inbound SSH is permitted. Test the actual application when you add it; the base VM does not establish an application’s firewall, TLS or database configuration.
For a thin-backed disk with Discard enabled, inspect lsblk --discard inside
Debian and check the distribution’s trim scheduling. Validate reclamation
against your actual backend and retained snapshots. Do not write large files
just to force a capacity demonstration on a busy host.
6. Take a backup and restore a copy
Choose a configured backup destination outside the failure boundary you need to survive. A backup file on the same physical disks as the VM will not survive loss of those disks.
Run a guest backup through PVE, checking that the OS disk and required additional disks are included. Keep the EFI variables disk with the recovery set. If the application later uses data outside the guest’s backed-up disks, extend the plan before relying on it.
Restore the backup to an unused VM ID on suitable storage and keep its NIC disconnected initially. This avoids duplicate addresses and application side effects. Check console boot and required files. If network or application testing is needed, use an isolated network and a deliberate identity plan before connecting the restored copy.
The guest agent’s filesystem coordination can help backups, but it does not replace a database-specific consistency method or a restore test. The Proxmox backup guide explains the choices and exclusions.
When the new VM does not behave as expected
| Symptom | First place to look |
|---|---|
| ISO cannot be selected | Check the storage’s ISO content type and upload completion |
| Installer cannot see the disk | Check VM hardware, guest storage availability and the selected disk controller |
| VM returns to the installer | Remove the ISO and review boot order |
| Firmware cannot boot the installed disk | Compare installation boot mode, OVMF settings and EFI variables disk |
| No DHCP lease | Trace the virtual NIC, bridge, VLAN path, switch and DHCP service |
| Address exists but package downloads fail | Separate default route, DNS resolution and access policy checks |
| Guest agent is unavailable | Check the guest package/service, PVE option and full stop/start requirement |
| Clean shutdown times out | Check the agent when enabled; inspect the guest console before forcing power off |
Change one layer at a time and compare with the saved configuration. Once this VM is working and recoverable, you can build an application on it or move on to Cloud-Init templates when you need repeatable clones.