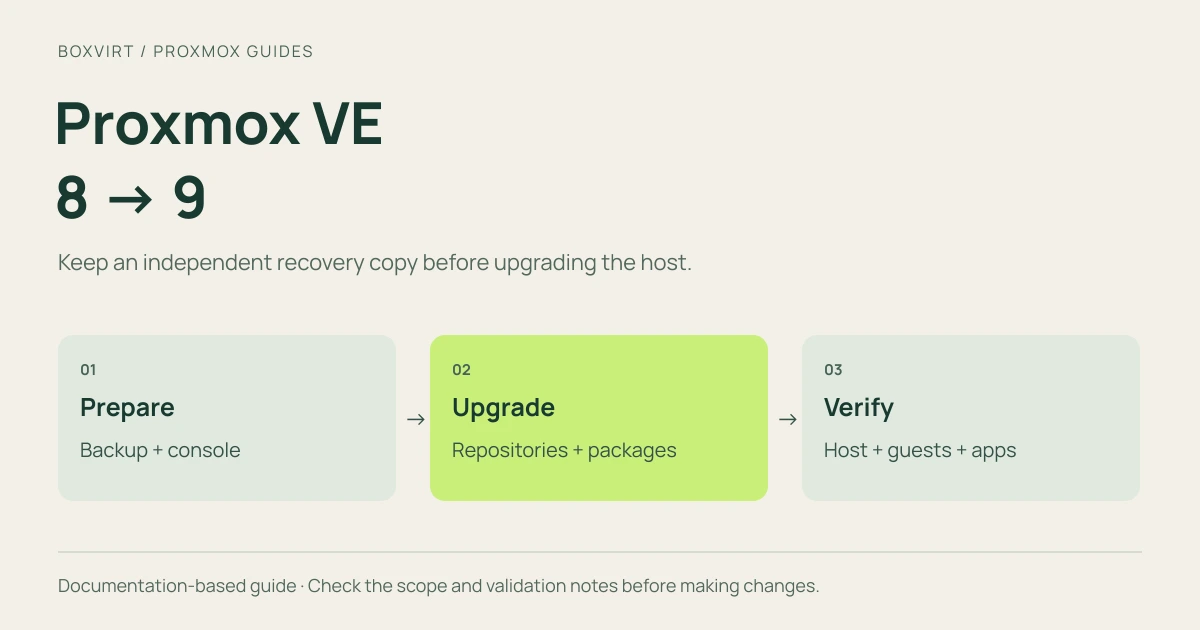
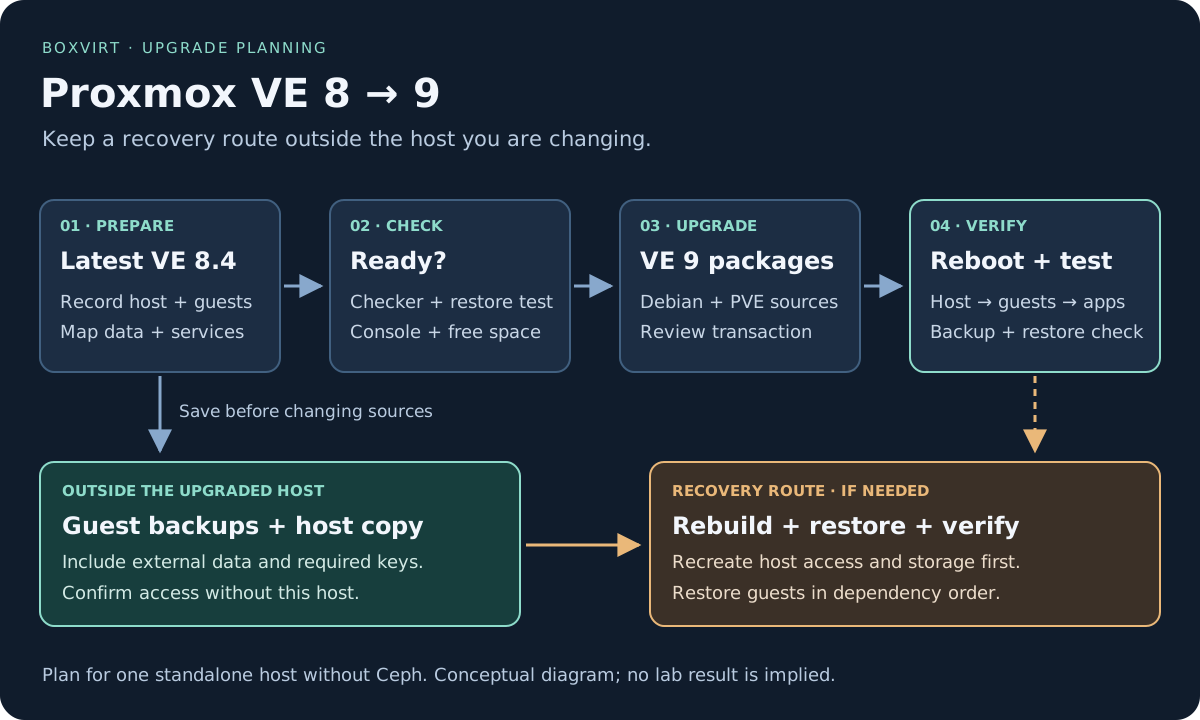
To upgrade Proxmox VE 8 to 9, first update the host to the latest 8.4
packages, test your backups and run pve8to9 --full. After resolving the
findings, switch the Debian and Proxmox repositories to the documented Trixie
configuration, upgrade the packages and reboot. Then check the host and each
service you depend on.
The preparation deserves as much attention as the package upgrade. A backup you cannot reach after losing the host, or a bridge tied to the wrong network interface, can turn a routine maintenance window into a much longer outage.
This guide explains the route for one standalone x86-64 host without Ceph. Use the official Proxmox 8-to-9 procedure alongside it, particularly its current prerequisites and known issues.
Validation: the commands and configuration examples below were checked against documentation on November 8, 2026. They have not been run through an upgrade on a test host. The Proxmox administration manuals reviewed identify themselves as version 9.2.13; that is a documentation version, not a tested host build. Rehearse the procedure on a separate host before using it on a system you rely on.
Decide whether this procedure fits your host
The worked scenario has one Linux VM, one unprivileged Linux container and backups held outside the host. Guest disks can be on local Directory, LVM-Thin or ZFS storage. The guest operating systems remain unchanged during this maintenance window.
If you use a cluster, HA, hyper-converged Ceph, a co-installed PBS server, third-party storage plugins or hardware passthrough, add the relevant product-specific checks before proceeding. For example, the official upgrade route requires hyper-converged Ceph to reach Squid before the PVE upgrade. A standalone-host walkthrough does not establish a safe rolling upgrade sequence for a cluster.
An in-place upgrade preserves the existing installation while replacing packages. A fresh installation followed by restore is another route, but the installer can erase disks you select. Choose your recovery route before changing either repositories or disks.
1. Write down what must survive
Start with a small inventory. You need to know where the data lives and what is needed to make it useful again.
The following guest IDs and names are illustrative. Replace them with your own; they are not observations from a tested installation.
| Item | Example | What to record before the upgrade |
|---|---|---|
| Host | pve-lab | PVE packages, running kernel, hostname, boot mode and root filesystem |
| Management | One bridge with a static address | Address/prefix, gateway, DNS, physical NIC name and MAC address |
| VM | VM 201, Linux application server | Disks, storage IDs, bridge/VLAN, startup settings and restore destination |
| Container | CT 202, unprivileged Linux | Root disk, additional mount points, UID mappings and data outside the root disk |
| Backup destination | PBS on a separate machine | Datastore, credentials, encryption recovery material and access without pve-lab |
| Dependencies | DNS, router, password manager | Which must be available before you can reach the backups or start the application |
Run the following read-only inventory commands as root on the Proxmox host, not inside a guest. Keep their output in your private maintenance notes:
pveversion -v
uname -r
cat /etc/os-release
pvesm status
qm list
pct list
ip -br link
ip -br address
ip route
df -h / /boot
If you use IPv6, also record ip -6 route. Check any separate EFI system
partition and other filesystems used for boot; free space on / alone does
not establish that a kernel can be installed successfully.
Inspect the example guests only after substituting their actual IDs:
qm config 201
pct config 202
Save an off-host copy of the host configuration, including /etc/pve,
network configuration, APT sources and local changes. Preserve required
package state as described in Debian’s upgrade preparation.
Check that your backup method includes /etc/pve: it is a separate mounted
filesystem, which a filesystem-limited copy may skip.
Protect this copy as sensitive data. It can contain authentication material.
Use it as a recovery reference; restoring an entire old /etc over a new
installation can overwrite settings the new system needs.
Know how this host boots
Record whether it uses BIOS or UEFI and which bootloader actually runs. Where applicable, inspect:
efibootmgr -v
proxmox-boot-tool status
An EFI-variable error can indicate BIOS boot. A missing
proxmox-boot-tool configuration is not, by itself, proof of a broken GRUB
installation. Interpret the output using the
Proxmox bootloader guide.
This matters because bootloader fixes depend on the installation. Do not apply a GRUB repair or remove a boot package merely because it helped a different host.
2. Prove that the backups can recover your services
Create fresh backups and restore a copy of each important guest to an isolated environment before the upgrade. Keep the restored copy disconnected from the production network until you have dealt with duplicate addresses, scheduled tasks and application side effects.
For VM 201, a useful check is to start the application, log in and read a known record or file. For CT 202, check the service and all required mounted data. Record which backup was used and what passed.
Review the Proxmox backup modes and inclusion rules for your guests. LXC bind mounts and device mounts are excluded from the container backup. Additional storage-backed mount points need their Backup setting checked. Inspect VM disk backup exclusions too. A completed job cannot protect data it was configured to omit.
Choose a consistency method appropriate to the application. A database may need its own backup or coordinated shutdown. The existing Proxmox backup guide helps identify those boundaries. If you are building a separate backup destination, follow the PBS setup guide before scheduling the upgrade.
If you use PBS, distinguish verification from recovery. A verify task checks stored backup data; it does not prove that your restored application works. Keep required client-side encryption keys accessible independently of the host, following the PBS encryption documentation.
One practical question exposes many weak plans: could you open this backup if the Proxmox host were switched off? If the backup server, router or only copy of the password manager runs on that host, resolve the dependency first.
3. Update within Proxmox VE 8 before switching releases
While the repositories still point to Bookworm / Proxmox VE 8, refresh the package index:
apt update
Resolve repository, authentication and signature errors before continuing. Then update the existing release:
apt dist-upgrade
Read the proposed transaction before accepting it. Once the operation has completed successfully, check:
pveversion
The official procedure calls for the latest Proxmox VE 8.4 packages, with
pve-manager at least 8.4.1. The minimum version is not a reason to skip
later 8.4 fixes. If this preliminary update requires a reboot, handle it as
its own maintenance step and verify the host before starting the major
upgrade.
Next run the full upgrade checker:
pve8to9 --full
The checker reports issues; it does not automatically fix them. Resolve failures, understand warnings and run it again after each correction. Keep the before-and-after output. A clean result is useful evidence, but it cannot prove compatibility with every local customization.
Use a clear stop-or-proceed checklist
| Check | Evidence to proceed | Stop when… |
|---|---|---|
| Backup and restore | Required guests and external data restored; application checks recorded | A needed disk, mount, key or credential is missing |
| Root and boot space | Enough room for the actual package transaction and boot files | A filesystem is full or the upgrade cannot stage its files |
| Package state | No unfinished package configuration; holds understood | An old failure or unexplained hold remains |
| Console access | Physical console or independent remote console tested | Losing the host network would leave you unable to recover |
| Checker | Failures resolved; each warning assessed | A warning is being ignored without understanding its effect |
| Guest compatibility | OS, storage and any special integrations checked | A required guest or plugin lacks a viable upgrade path |
The official minimum for free root space is 5 GB, with more than 10 GB preferred. Check the space APT actually needs as well.
These commands help inspect package state:
dpkg --audit
apt-mark showhold
dpkg --audit should not report incomplete package states. A hold deserves
investigation rather than blanket removal; see the
dpkg manual
and apt-mark manual.
Check the changes that can break a small homelab
The VE 9.0 breaking changes include network interface naming, changed VirtIO NIC MTU defaults and removal of the old cgroup v1/hybrid option. An unset VirtIO MTU now inherits the bridge MTU. On a bridge using jumbo frames, that deserves a deliberate decision. Old Linux containers may need replacement or an OS migration first.
Also inspect custom kernel modules, passthrough and host tuning against the
current known-issues list. Settings in /etc/sysctl.conf need attention:
the systemd implementation shipped with VE 9 expects local settings in
/etc/sysctl.d/. This is particularly relevant when the host routes traffic.
If the checker flags systemd-boot packages or LVM autoactivation, follow its
installation-specific instructions and the corresponding official sections.
Those actions are conditional. A local LVM-Thin host and a shared-LVM cluster
do not have identical requirements.
4. Switch repositories deliberately
PVE packages and the Debian base system must move together. Changing only one side can leave APT unable to resolve the upgrade.
Inspect /etc/apt/sources.list and every active .list or .sources file
under /etc/apt/sources.list.d/. APT reads both formats; editing one familiar
file does not establish that the others are correct. The
sources.list manual
explains the formats and how to disable an entry.
Use the following as a review map, not a global search-and-replace command:
| Source | Target for this upgrade |
|---|---|
| Debian base and updates | trixie, trixie-updates |
| Debian security | trixie-security |
| Proxmox VE | trixie and the chosen PVE repository component |
| Ceph entries, if present | Review separately using the official Ceph repository instructions |
| Third-party sources | Confirm Trixie support and the supported package migration |
Read the current Proxmox repository definitions before editing. Remove Bookworm/backports sources from the active upgrade configuration as directed by the official procedure. Disabling a third-party repository does not uninstall its packages or make them compatible.
Example Debian sources
For a standard installation, the following deb822 content illustrates
/etc/apt/sources.list.d/debian.sources. Preserve any additional components
your installed packages require after checking their Trixie support.
This is file content, not a shell command:
Types: deb
URIs: http://deb.debian.org/debian/
Suites: trixie trixie-updates
Components: main non-free-firmware
Signed-By: /usr/share/keyrings/debian-archive-keyring.gpg

Types: deb
URIs: http://security.debian.org/debian-security/
Suites: trixie-security
Components: main non-free-firmware
Signed-By: /usr/share/keyrings/debian-archive-keyring.gpg
If replacing existing entries, disable their old definitions rather than leaving duplicates active. Keep a private copy of the original files.
Choose the Proxmox repository matching your installation
With a valid enterprise subscription, the PVE entry can be held in
/etc/apt/sources.list.d/pve-enterprise.sources:
Types: deb
URIs: https://enterprise.proxmox.com/debian/pve
Suites: trixie
Components: pve-enterprise
Signed-By: /usr/share/keyrings/proxmox-archive-keyring.gpg
For the illustrative non-production lab without a subscription, the
alternative entry in /etc/apt/sources.list.d/proxmox.sources is:
Types: deb
URIs: http://download.proxmox.com/debian/pve
Suites: trixie
Components: pve-no-subscription
Signed-By: /usr/share/keyrings/proxmox-archive-keyring.gpg
Choose the intended channel; do not paste both examples indiscriminately. Proxmox recommends enterprise packages for production and describes the no-subscription channel as less extensively validated. Keep signature verification enabled. If the referenced keyring is missing, resolve that using the official keyring instructions before proceeding.
Even a host without an active Ceph cluster can have Ceph packages or source entries. Inspect them; the absence of a Ceph workload is not a reason to leave a stale Bookworm source active.
Check what APT will actually install
After editing the sources, run:
apt update
Proceed only after it finishes without unresolved repository errors. Then inspect origins and candidate versions:
apt policy
apt policy proxmox-ve pve-manager
Confirm the intended Trixie repositories and a PVE 9 candidate for
pve-manager. Investigate any unexpected distribution, channel or pinning.
Use a simulation to review the proposed package changes:
apt-get --simulate dist-upgrade
A simulation does not install packages or prove that maintainer scripts and
the next boot will succeed. It helps you inspect the transaction. If it
proposes removing proxmox-ve, stop and investigate sources and conflicts;
do not bypass the protective APT hook. Debian documents the dependency and
simulation behavior in apt-get(8).
5. Upgrade packages in a session you can recover
Schedule an outage for a single host. Record each guest’s Start at boot
(onboot) setting and startup order. In its PVE Options panel, temporarily
disable Start at boot for guests that must wait for your post-reboot checks.
Shutting a guest down does not disable its next automatic start; the
VM startup option and equivalent
container setting are separate controls.
Shut down the guests cleanly through PVE and confirm their state. Pause any other scheduled starts and backup jobs for the window, recording what to re-enable. If a router or DNS server is a guest, ensure its shutdown will not remove the host’s access to repositories or your recovery console.
Use a physical or independent remote console. If using SSH, use a terminal
multiplexer such as tmux, already installed and tested before this step.
Do not run the upgrade through the web interface’s host shell: that session
can disappear when PVE services restart.
With the previous checks passed, start the actual package upgrade:
apt dist-upgrade
Stay with the session. Read prompts and inspect configuration differences. For example, replacing a customized SSH configuration can change access, while replacing GRUB defaults can discard kernel parameters. The right answer depends on your local changes; choosing the same answer for every file is not a recovery strategy.
Wait for successful completion. Review any package, initramfs and bootloader errors before rebooting. Then run the checker again:
pve8to9 --full
Once the package operation and required corrections are complete, reboot from the independent console or PVE interface. Installing packages does not switch the running kernel by itself.
6. Verify the host, then the applications
After reboot, compare the inventory with your saved record:
pveversion -v
uname -r
cat /etc/os-release
pvesm status
ip -br link
ip -br address
ip route
dpkg --audit
Expect PVE 9 packages, Debian 13/Trixie and the intended upgraded kernel. Check the actual package and kernel versions selected for your maintenance window; do not judge success by matching an old screenshot’s exact suffix.
Open a new management session from your administrator device. Refresh the browser cache if the PVE interface behaves oddly after the upgrade. Confirm that every required storage is accessible and holds the expected guest volumes before starting guests.
| Layer | Useful acceptance check |
|---|---|
| Host management | New GUI and SSH sessions work from the intended management network |
| Storage | Expected entries are active; guest volumes and backup destination are accessible |
| VM 201 | Guest boots, has the expected disks and reaches its gateway and DNS |
| CT 202 | Container starts; required mounts, ownership and service data are intact |
| Application | Login works and a known file or database record can be read |
| Backup | A new job completes and a restored copy passes the application checks |
| Scheduling | Intended startup, backup and monitoring settings are restored |
Start infrastructure dependencies before applications that need them. Test the service from a real client: a running guest is only one part of the result. For network failures, use the saved NIC/MAC and bridge information and the Proxmox networking guide.
Keep pre-upgrade recovery copies until the new installation, applications and backups have passed their checks. Record the actual versions, results and any unresolved issue in your maintenance notes.
If the upgrade does not go to plan
Locate the failed layer before changing more settings. The table gives starting points rather than universal repair commands.
| Symptom | First investigation |
|---|---|
pve8to9 is missing | Check the installed VE 8 packages and Bookworm repository configuration |
apt update reports authentication or signature errors | Check channel access, source definitions, host time and keyrings; preserve verification |
APT wants to remove proxmox-ve | Review the transaction, repository mix and conflicting packages |
| Package installation stopped halfway | Recover the console session, read the exact failure and establish package state before attempting repair |
| Host boots but management is unreachable | Compare NIC names/MACs, bridge membership, addresses and routes from the console |
| GRUB or EFI fails before Linux starts | Use recovery media and instructions matching the recorded root filesystem and bootloader |
| A guest starts but its application fails | Check guest disks, mounts, network and application dependencies against the pre-upgrade record |
Proxmox provides a GRUB recovery guide. Read the branch matching your system. Avoid pasting disk-formatting, bootloader-installation or thin-pool repair commands with another person’s device names.
If repair is not appropriate, use the rebuild-and-restore route you prepared: identify the installation disks, reinstall the chosen supported PVE release, recreate management and storage access, then restore guests in dependency order. Selectively reapply necessary host settings and check the applications. That route needs its own rehearsal before you depend on it.
An old kernel can sometimes help diagnose a boot or driver regression, but booting it does not reverse the upgraded Debian packages. Changing Trixie sources back to Bookworm is not a general rollback procedure either. Your recovery plan must account for the host configuration, guest data, credentials and the services needed to reach them.