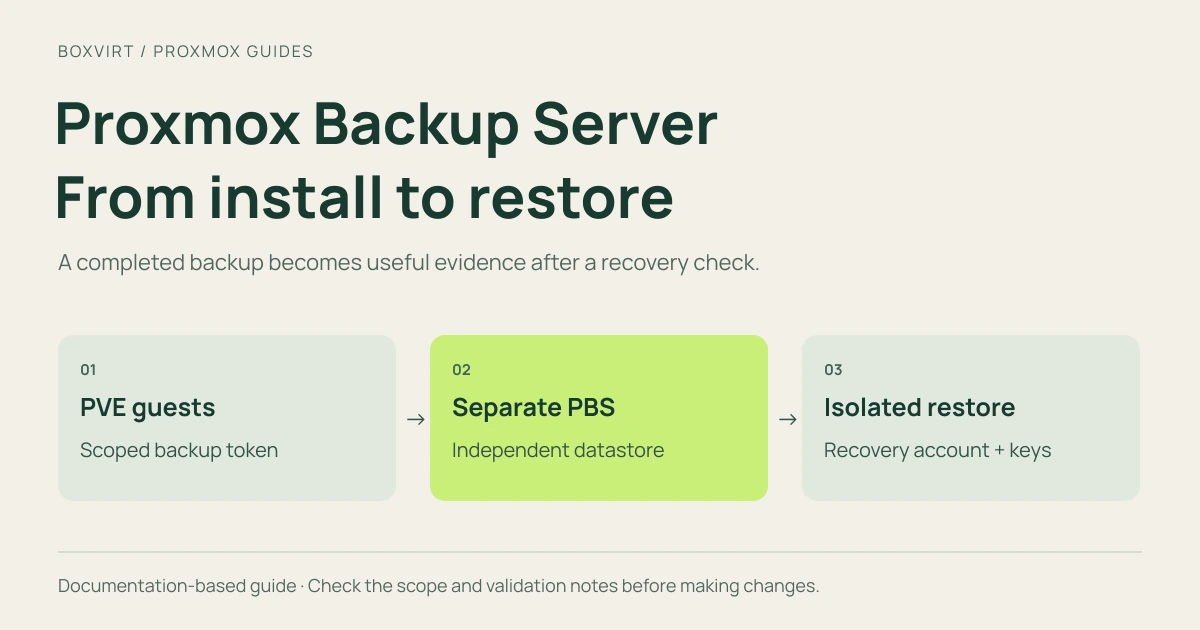
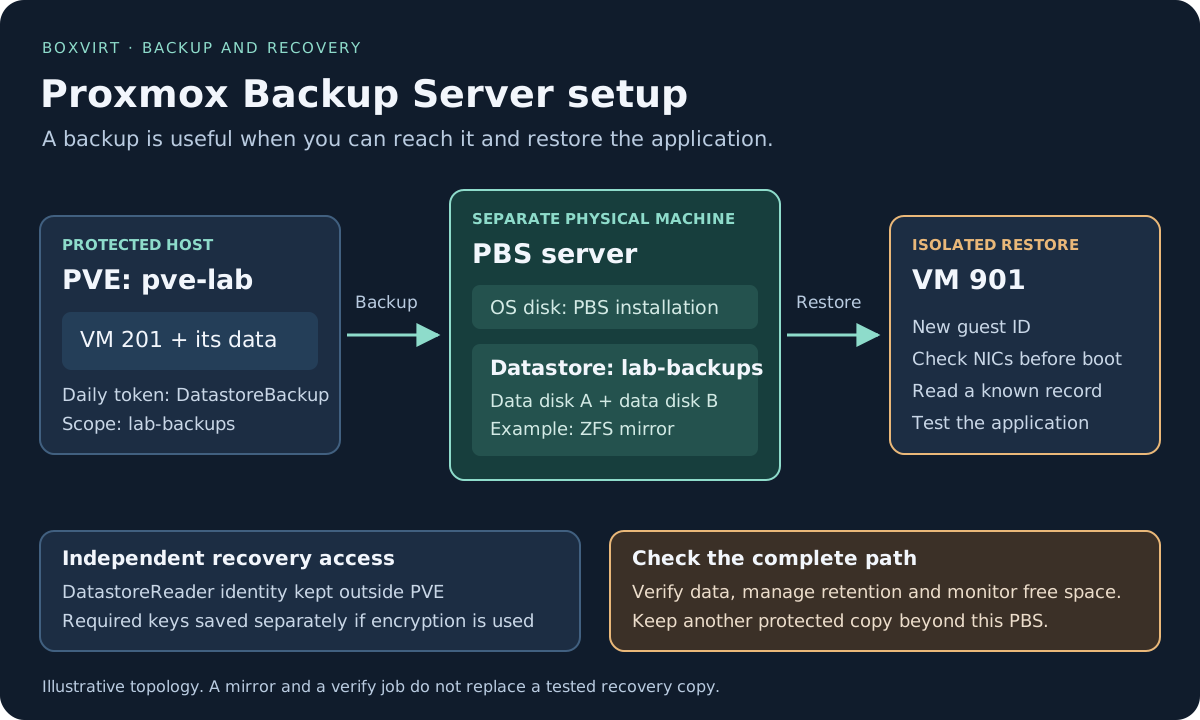
To set up Proxmox Backup Server, install PBS on a separate machine, create a datastore on its backup disks, and give your Proxmox VE host a restricted account for that datastore. Add PBS as storage in PVE, back up one guest and restore a copy under a new ID on an isolated network. That last step proves more than a successful backup notification.
This guide follows one small installation from the ISO to an application check after restore. The example uses a dedicated PBS machine, a separate OS disk and two empty data disks in a ZFS mirror. A mirror keeps the datastore available after some disk failures; it does not replace another independent copy of the backups.
Validation: this guide was checked against documentation on November 8, 2026. The PBS pages reviewed identify themselves as version 4.2.9-1. No installation, backup or restore described here has been performed on a test host. Confirm the exact PVE/PBS builds and rehearse the disk, permission and recovery steps before relying on the procedure.
For a disposable practice guest, use the Linux VM walkthrough. Keep its backup and restore checks separate from any important production guest.
Plan the backup server before booting the installer
Keep PBS independent of the host it protects. If the PVE host fails, you should still be able to power up PBS, reach the datastore and retrieve the credentials needed for recovery. The official getting-started guide recommends dedicated hardware.
Use the following names as examples, not as existing equipment or measured capacity:
| Item | Example | Purpose |
|---|---|---|
| PVE host | pve-lab | Runs the protected guests |
| PBS machine | pbs-lab.example.com | A separate physical server, reachable on the private management network |
| PBS OS disk | One identified SSD | Holds the PBS installation; selected disk will be erased |
| PBS data disks | Two identified empty disks | Form the example ZFS mirror; selected disks will be erased |
| Datastore | lab-backups | Stores backup chunks, indexes and metadata |
| PVE storage ID | pbs-lab | PVE’s name for the PBS connection |
| First protected guest | VM 201 | A disposable Linux VM with a known test file or application record |
| Restore guest | VM 901 | An unused ID, with isolated networking and no automatic startup |
Replace the documentation domain with your internal hostname. Do not expose
the PBS administration interface directly to the internet. Make sure PVE can
reach PBS on HTTPS TCP 8007 and that both machines have working DNS and time
synchronization. Access to PBS, its password manager and network equipment
must not depend entirely on pve-lab being available.
Check the current PBS system requirements against your intended workload. The evaluation minimum is not a production sizing recommendation. Leave room for the backup history, changed data and maintenance, rather than sizing the datastore to one full copy. The retention capacity guide explains why the number of retained snapshots does not translate directly into a fixed multiple of the guest disk size.
1. Verify the installer and choose only the OS disk
Download the ISO from the official PBS download page. Compare the file’s SHA-256 with the value published for that exact image. For example, on the computer holding a downloaded 4.2-1 image:
sha256sum ./proxmox-backup-server_4.2-1.iso
The filename illustrates a version listed when this guide was researched; select and verify the image you actually intend to install. A matching hash from the trusted HTTPS download page checks that the downloaded file matches the published image. Record the image version and checksum in your install notes.
Write the ISO to a USB device using the installation guide’s supported method. That operation erases the selected USB device. Before installing, record the model, capacity and serial number of every OS and data disk. Temporarily disconnecting disks that must remain untouched can reduce the chance of selecting one accidentally.
Boot the PBS installer and select only the intended OS disk. In this example the datastore mirror is created later. Review the installation summary before accepting disk erasure. Set the time zone, a unique root password, administrator email, hostname, management address/prefix, gateway and DNS server. Use the official installation walkthrough for the screens in your selected build.
After installation, remove the USB and reboot. At the PBS console, confirm the management settings and obtain its API certificate fingerprint:
proxmox-backup-manager cert info
Open https://YOUR-PBS-HOSTNAME:8007 from the management network. With the
default self-signed certificate, compare the browser certificate fingerprint
with the one obtained from the trusted PBS console before trusting that
specific certificate. A certificate obtained only from the unverified remote
connection does not independently establish the server’s identity.
Log in as root@pam for the initial setup. In the PBS repository and update
panels, confirm the intended subscription channel, refresh package indexes
and install available updates. The download page recommends updating a new
ISO installation. Resolve repository or signature errors, then reboot if
required. Record the actual installed package version; the ISO version alone
does not describe the final system.
2. Create the data pool and datastore
Reconnect the intended empty data disks, if they were disconnected. In Administration → Storage / Disks, identify them by model, size and serial number. These read-only commands, run on the PBS machine, can help inspect the inventory:
lsblk -o NAME,SIZE,MODEL,SERIAL,FSTYPE,MOUNTPOINTS
proxmox-backup-manager disk list
Device letters can change. Do not decide that a disk is safe to erase merely
because another guide calls it /dev/sdb.
For the example layout, open the ZFS section, create a pool named
backup-pool, select Mirror, and choose the two recorded data disks.
Review both selections before creating it. Leave automatic datastore
creation off so that the next step gives the datastore its own explicit ID.
Pool creation partitions or overwrites those selected disks. Do not put ZFS
behind a hardware RAID virtual disk as a substitute for exposing the intended
individual disks.
Then choose Add Datastore and use:
| Field | Example value |
|---|---|
| Name | lab-backups |
| Backing Path | /mnt/datastore/backup-pool/lab-backups |
| Comment | PVE lab guests; separate physical backup server |
This path assumes that the pool creation step mounted backup-pool at
/mnt/datastore/backup-pool. Check that mount before creating the datastore.
The directory must be on the intended data filesystem, not merely an
identically named directory on the OS disk. Confirm the mount and datastore
availability again after a planned PBS reboot.
The PBS storage guide
describes the disk and datastore interfaces. The pool name, backing path and
datastore ID are different things: PVE will ask for lab-backups, not the
filesystem path.
3. Give the PVE host a scoped backup token
Keep root credentials out of the PVE storage connection. In PBS access
control, create a dedicated user such as pve-backup@pbs, then generate a
token named pve-lab for it. Store the token secret immediately in your
approved password store; PBS does not show the same secret again later.
Assign DatastoreBackup on /datastore/lab-backups to both identities:
| Identity | Role | ACL path |
|---|---|---|
pve-backup@pbs | DatastoreBackup | /datastore/lab-backups |
pve-backup@pbs!pve-lab | DatastoreBackup | /datastore/lab-backups |
Use the datastore’s ACL path, not its disk mount path. This example uses the root namespace of a datastore dedicated to the lab. If you introduce namespaces, reconsider the exact ACL path and propagation rather than granting access to every datastore.
A token needs its own ACL, and its effective permissions are limited by the parent user. Granting a role to only one of them can leave the token unable to use the datastore. You can inspect effective permissions on PBS without printing the token secret:
proxmox-backup-manager user permissions 'pve-backup@pbs!pve-lab' --path /datastore/lab-backups
The PBS access-control guide
defines the roles and token intersection. DatastoreBackup can back up and
restore owned groups. It does not grant general snapshot pruning or access
to every other owner’s data. Keep retention management on PBS for this
example; configure PVE to keep all backups rather than ask its limited token
to prune them.
Prepare separate recovery access as well. A human-operated recovery account with DatastoreReader on this datastore can read backups across owners. Keep that credential outside the protected host and use it only for recovery and tests. If it uses an API token, both user and token need the corresponding ACL. Keep PBS administrative access separate from both roles.
Backup groups retain ownership information. Replacing a token or moving a backup job to a different account can cause ownership errors even when a new credential has the same role. Inspect the existing owner and use the documented ownership workflow; do not broaden the daily account to Admin as a routine fix.
4. Add PBS storage in Proxmox VE
In the PVE interface, open Datacenter → Storage → Add → Proxmox Backup Server. Use:
| Field | Example |
|---|---|
| ID | pbs-lab |
| Server | Your internal PBS hostname |
| Username | pve-backup@pbs!pve-lab |
| Password | The token secret, not the user’s interactive password |
| Datastore | lab-backups |
| Fingerprint | The independently checked PBS certificate fingerprint, if needed |
| Namespace | Root/default namespace for this example |
Restrict the storage to the intended PVE node where appropriate. With a publicly or privately trusted CA certificate, use the hostname covered by the certificate and working CA trust. With a self-signed certificate, pin the checked fingerprint. Do not solve a TLS error by disabling verification.
The PVE PBS backend guide explains the storage properties. Once added, inspect its status from the PVE host or the GUI:
pvesm status --storage pbs-lab
An active storage entry demonstrates a usable connection. It has not yet proved that a guest can be backed up or recovered.
Decide about encryption before the first important backup
PVE can encrypt backups before sending them to PBS. If you enable encryption
in the storage settings, preserve the actual key independently of the PVE
host. The documented PVE key location for this storage ID is
/etc/pve/priv/storage/pbs-lab.enc; handle any exported copy as a secret.
Keep a protected recovery copy in a place you can reach after losing PVE, and test it on a recovery installation. An API token secret authenticates access to PBS; it does not replace the decryption key. Optional master-key recovery has its own private key to preserve. Follow the PBS encryption and key-recovery documentation and the PVE backend instructions for the chosen method.
5. Back up one guest and inspect what was included
Use a disposable VM first. For VM 201, inspect its disks and backup flags, confirm the destination and choose a consistency method appropriate to the application. Snapshot backup mode does not establish application consistency by itself.
In the guest’s Backup panel, choose Backup now, select pbs-lab and
the intended mode. Read the complete task log. On PBS, open
Datastore → lab-backups → Content and inspect the resulting backup group
and snapshot. Record the guest ID, snapshot time, encryption status,
warnings and any excluded data.
For LXC guests, bind mounts and device mounts are not included in the normal container backup. Check additional volume-backed mount points individually. Use the existing Proxmox backup guide to inventory external data and coordinate database backups before adding real services to the schedule.
After the manual backup and restore test pass, create the scheduled job under
Datacenter → Backup. Select explicit guests, pbs-lab, a maintenance
window and notification settings. Keep PVE pruning disabled for this setup,
including any inherited storage retention setting; PBS will manage it.
6. Restore into an isolated copy
Do this before treating the new system as your working backup solution:
- Choose an unused guest ID, such as 901, and enough destination storage.
- In PVE’s PBS storage content view, select the exact VM snapshot and choose Restore. For an owned group, the backup token can read it. When testing wider recovery or loss of the original owner, add a separate temporary PBS storage connection using the prepared recovery identity.
- Restore under the new ID. Leave Start after restore disabled.
- Inspect every restored NIC, startup setting and application dependency. Disconnect the NIC or attach it to an isolated bridge before booting.
- Supply the independently held encryption key if required by the recovery installation. Merely reaching PBS cannot decrypt an encrypted backup.
- Boot the copy and check a real application operation: log in and read the known file or database record. Check permissions and any external data.
Prevent duplicated scheduled tasks, outbound messages and conflicting IP addresses during the test. A new VM ID does not by itself change every identity or static address inside the restored guest. VM and container restore use different workflows; do not feed a container snapshot into a VM restore.
Record the snapshot, recovery credentials used, key source, target, checked data and missing dependencies. If you measure elapsed time, include manual preparation and application checks. No restore time is assumed by this guide.
7. Configure maintenance and notifications
PBS needs more than a scheduled write job. Give each operation a clear purpose and review its result:
| Operation | What it establishes or changes |
|---|---|
| Guest backup | Creates a recovery snapshot of the included guest data |
| Verification | Checks stored backup data for integrity; does not start the application |
| Prune | Removes snapshot metadata according to retention rules |
| Garbage collection | Reclaims unreferenced chunks when its safety conditions allow |
| Restore test | Checks access, keys, guest recovery and the application |
In the datastore’s Verify Jobs tab, configure checking of new backups and periodic re-verification. For encrypted backups, a server-side verify pass does not establish that you still possess a usable decryption key.
Under Prune & GC, configure a retention policy that fits the data-loss
history you need and the space available. As a learning example, explore
keep-daily: 7 and keep-weekly: 4 in the prune simulator before enabling it.
These rules do not simply mean eleven copies: PBS applies retention by time
period. Choose timings after observing how long jobs take, rather than
assuming each finishes before the next fixed clock time.
Deleting a snapshot does not immediately delete its underlying chunks. Garbage collection is separate and includes a grace period; space can remain pending after pruning. See the PBS maintenance guide for scheduling and the current behavior. Monitor free space and growth, especially while establishing the first retention cycle.
Configure a notification target and matcher in PBS, send a test message and confirm actual receipt. Also test the PVE backup job’s notifications: it is a different task source. The notification documentation explains routing by target and matcher. A saved recipient address is not proof of delivery.
Check the setup as a complete recovery path
| Check | Expected evidence |
|---|---|
| Disks | OS and datastore disks identified; datastore sits on its intended mounted filesystem |
| Identity | TLS trust verified; PVE uses a scoped token rather than PBS root credentials |
| Permissions | Daily backup works; separate recovery access can read the intended existing groups |
| Contents | Required disks and external application data accounted for |
| Recovery | An isolated guest restores and passes application checks with the independent key copy |
| Maintenance | Verify, retention and GC tasks reviewed; space and failures monitored |
| Alerts | Both PBS maintenance and PVE backup notifications arrive |
If PVE cannot list the datastore, check the datastore ID, token ACL and parent user ACL. If only older groups are inaccessible, inspect ownership. If the connection fails after a certificate change, verify the new identity through your trusted path before changing its pin. If a restore boots without the expected data, revisit exclusions, mounts and the application consistency method before trusting subsequent jobs.
Finally, plan another protected copy outside this PBS machine’s failure boundary. Separate hardware helps with losing PVE; it does not make a single backup server survive every deletion, compromise or site failure. Preserve PBS configuration and the material needed to rebuild access, without formatting or recreating the existing datastore during recovery.