— Make Local and External Access Work Seamlessly
What is NAT?
NAT (Network Address Translation) lets multiple devices on your internal network (usually private IPs like 192.168.x.x) share a single public IP to communicate with the internet.
MikroTik uses source NAT (src-nat) with masquerade by default to make this happen.
🧭 Basic Outbound NAT — Internet Access for LAN
Let’s make sure devices in your LAN can access the internet.
/ip firewall nat
add chain=srcnat out-interface-list=WAN action=masquerade comment="LAN to internet"
This tells MikroTik:
“All packets leaving the WAN interface should have their source IP replaced with the router’s public IP.”
📥 What About Incoming Connections?
Suppose you want to host something like:
- A website on your NAS
- An Immich gallery on your home server
- A game server on your PC
You’ll need to port-forward incoming traffic from your public IP to the correct internal IP.
🌐 Step-by-Step: Create a Destination NAT (Port Forward)
Let’s say your NAS is at 192.168.88.100 and you want to expose HTTPS (TCP port 443):
/ip firewall nat
add chain=dstnat dst-address=YOUR_PUBLIC_IP protocol=tcp dst-port=443 \
    action=dst-nat to-addresses=192.168.88.100 to-ports=443 comment="Forward HTTPS to NAS"
If you have a dynamic IP, you can use interface lists instead:
/ip firewall nat
add chain=dstnat in-interface-list=WAN protocol=tcp dst-port=443 \
    action=dst-nat to-addresses=192.168.88.100 to-ports=443 comment="Forward HTTPS"
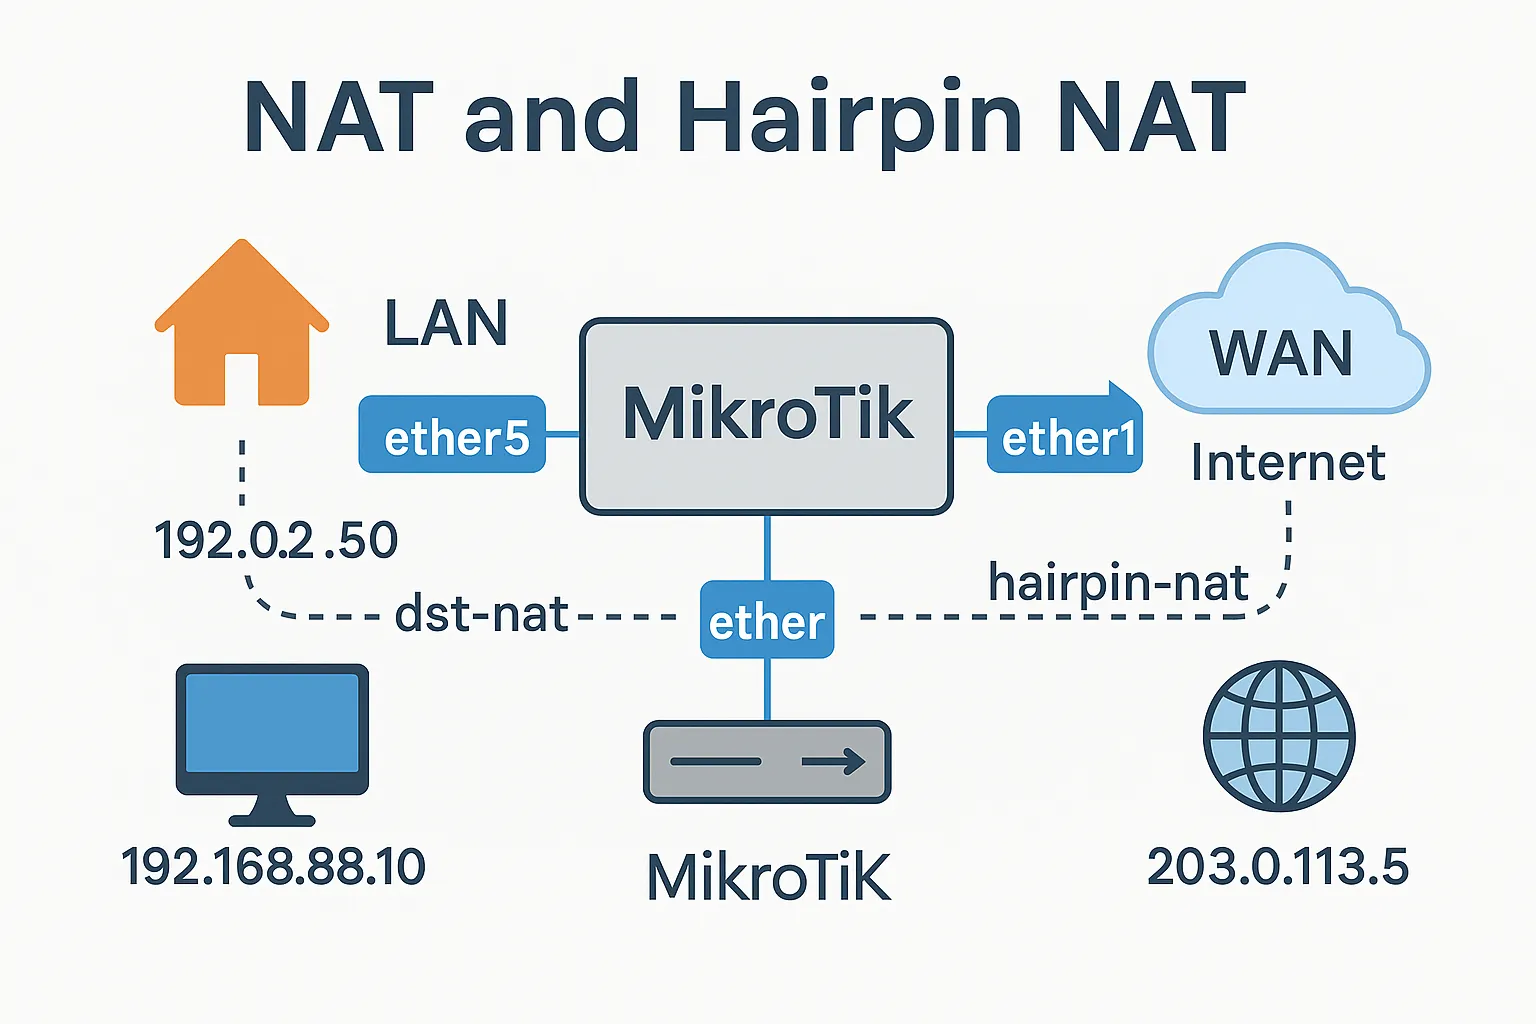
🌀 What Is Hairpin NAT?
Imagine this:
- Your DNS (e.g., Unbound or Pi-hole) resolves
nas.yourdomain.comto your public IP - You’re inside your home network
- You open
https://nas.yourdomain.com
Now your request leaves the LAN → goes to the router’s public IP → hits the port forward… and fails ❌
That’s because by default, MikroTik doesn’t know how to reflect this back to LAN — it’s confused because the destination is “external,” but the source is internal.
That’s where Hairpin NAT comes in.
🔧 How to Enable Hairpin NAT
You’ll need two extra rules to make it work:
1. Accept Internal Reflection in Firewall
/ip firewall filter
add chain=forward src-address=192.168.88.0/24 dst-address=192.168.88.100 action=accept \
    comment="Allow hairpin access to NAS"
Adjust IPs accordingly.
2. Add NAT Reflection Rule
This rule rewrites the source address so the internal server sees it as coming from the router:
/ip firewall nat
add chain=srcnat src-address=192.168.88.0/24 dst-address=192.168.88.100 \
    out-interface=bridge action=masquerade comment="Hairpin NAT"
Replace
bridgewith your LAN bridge or interface if different.
Now you can access https://yourdomain.com inside your LAN, and it will hit the internal server without issues.
⚠️ Troubleshooting Tips
- Make sure your port forward is above the general masquerade rule in NAT
- Check that your firewall forward chain allows the internal access
- If using VLANs, match the correct interfaces/subnets in Hairpin NAT rule
- Test from a real client, not the router itself
🧾 Full Example: HTTPS to NAS With Hairpin
# Port forward
/ip firewall nat
add chain=dstnat in-interface-list=WAN protocol=tcp dst-port=443 \
    action=dst-nat to-addresses=192.168.88.100 to-ports=443 comment="HTTPS to NAS"

# Hairpin NAT
/ip firewall nat
add chain=srcnat src-address=192.168.88.0/24 dst-address=192.168.88.100 \
    out-interface=bridge action=masquerade comment="Hairpin NAT"

# Allow forward
/ip firewall filter
add chain=forward src-address=192.168.88.0/24 dst-address=192.168.88.100 action=accept
✅ Summary
✔ You understand what NAT and port forwarding are
✔ You can expose internal services to the public safely
✔ You added Hairpin NAT to make them accessible locally
✔ You troubleshooted common issues like DNS and interfaces