Introduction: The Heart of Your Virtualized World
Once you have Proxmox installed, you’ll quickly realize that networking is the backbone of your entire virtualization setup. It’s how your virtual machines (VMs) and containers connect to each other, to your local network, and to the internet. While it may seem complex at first, Proxmox’s networking model is incredibly powerful and flexible.
This guide will demystify the core components of Proxmox networking. We’ll break down Linux Bridges, explain how to use VLANs to segment your traffic, and touch on NIC Bonding for advanced setups.
The Core Concept: The Linux Bridge
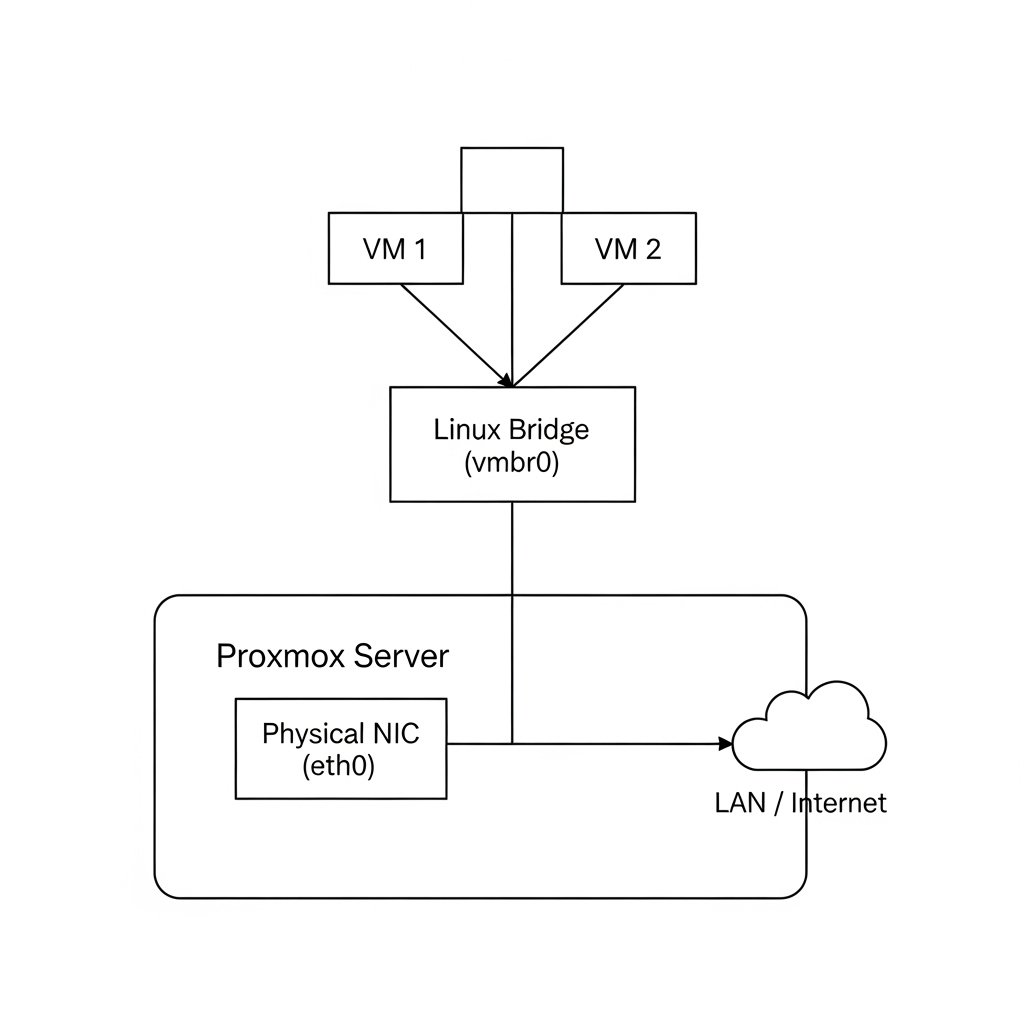
The simplest way to think of a Linux Bridge (like the default vmbr0 created during installation) is as a virtual network switch.
Imagine a physical switch in your office. You plug your computer into it, you plug the printer into it, and you plug the internet router into it. Now they can all talk to each other.
A Linux Bridge in Proxmox does the exact same thing, but virtually:
- Your server’s physical network card (e.g.,
eth0) is «plugged into» the bridge. - The virtual network cards of all your VMs and containers are also «plugged into» this same bridge.
The result? All your VMs can talk to each other and access your physical LAN (and the internet) through the server’s physical NIC.
Practical Guide: Creating a New Isolated Network
What if you want a separate, isolated network just for your VMs that can’t access the internet? This is easy to do by creating a new bridge that is not connected to a physical NIC.
- In your Proxmox UI, navigate to your Node ->
System->Network. - Click
Create->Linux Bridge. - Give it a name (e.g.,
vmbr1). - Do not add any «Bridge ports». Leave this field blank.
- You can give it an IP address (e.g.,
10.10.10.1/24) if you want your Proxmox host to be able to communicate on this network. - Click
Create.
Now, when you create a new VM, you can choose vmbr1 as its network bridge. All VMs on vmbr1 will be able to talk to each other, but they will be completely isolated from your main LAN.
Advanced Topic 1: Using VLANs in Proxmox
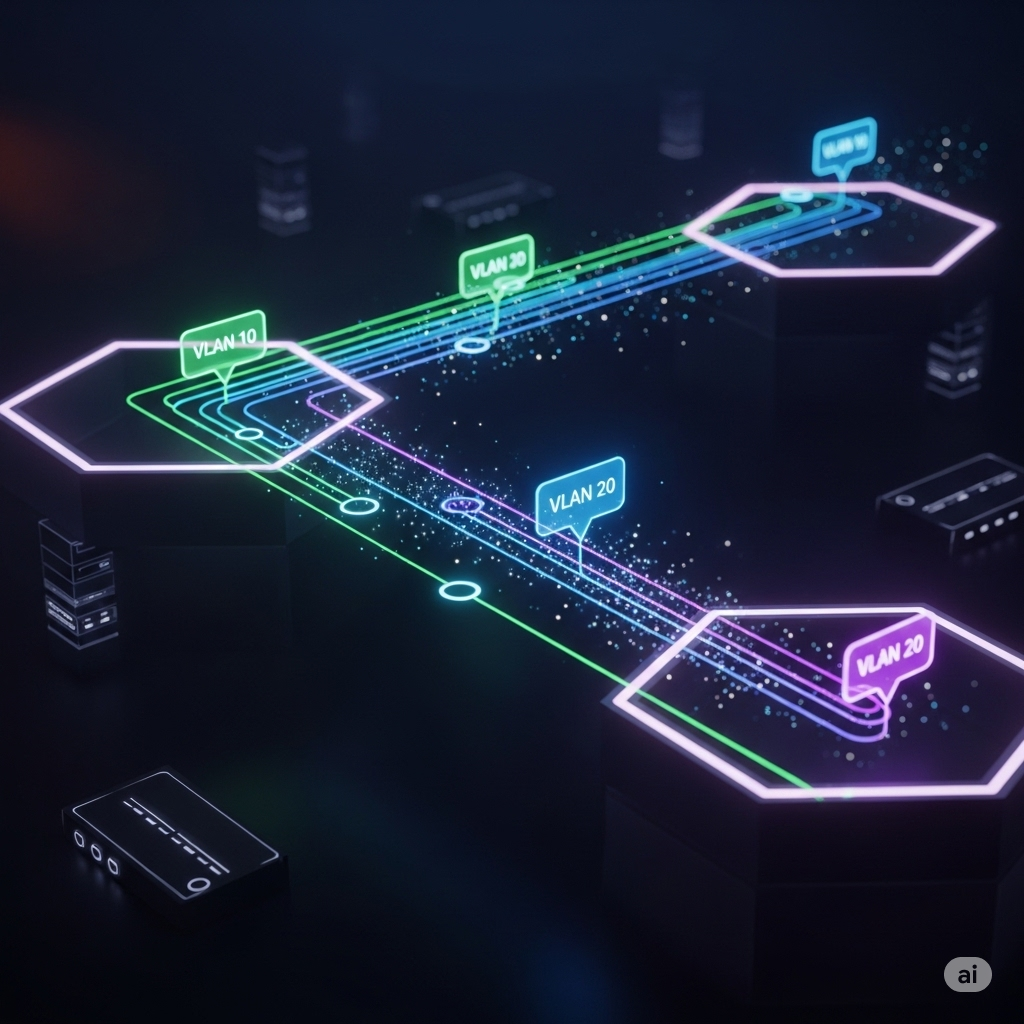
VLANs (Virtual LANs) are a professional way to segment a single physical network into multiple logical networks. This is essential for security and organization. For example, you might want your security cameras on a separate network from your personal computers.
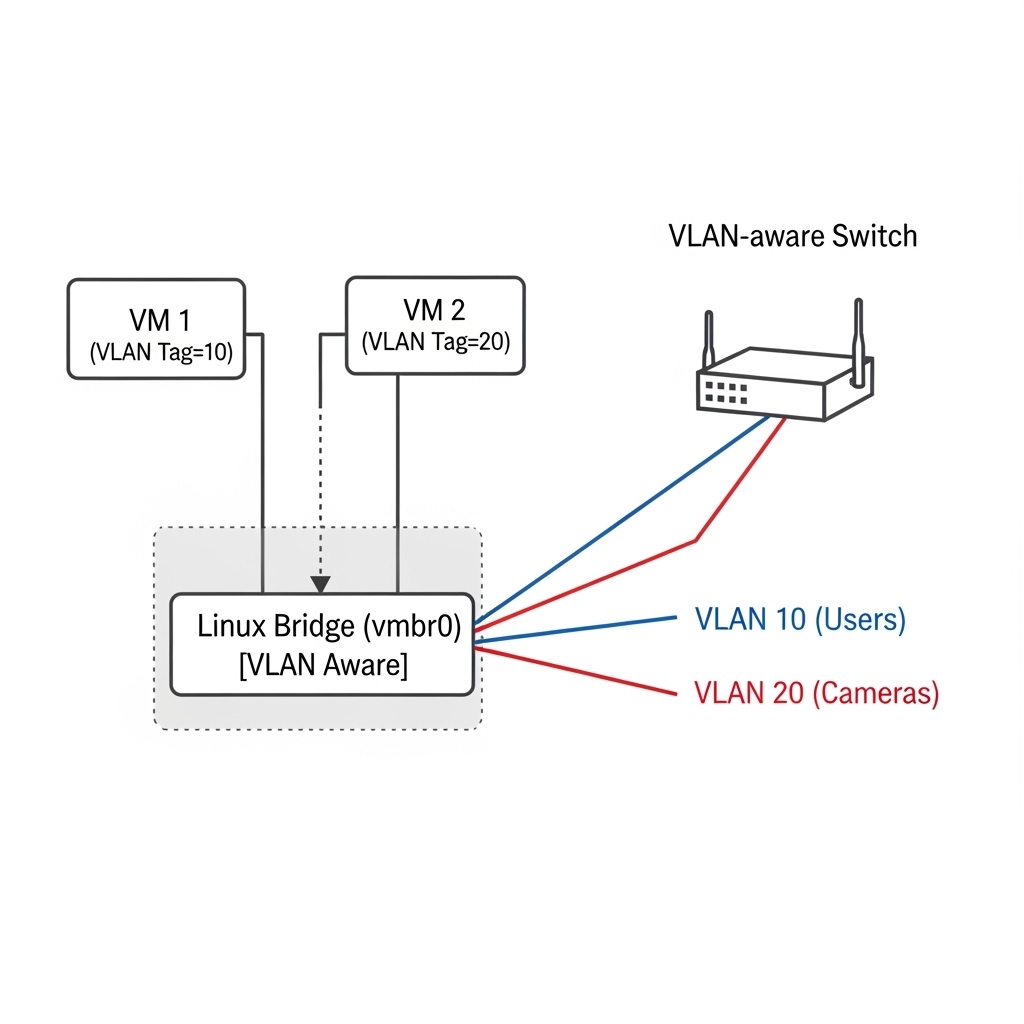
Proxmox has first-class VLAN support. The key is to have a «VLAN-aware» switch in your physical network.
Here’s how it works:
- Your physical switch is configured to handle tagged VLAN traffic (e.g., VLAN 10 for users, VLAN 20 for cameras).
- In Proxmox, your main Linux Bridge (
vmbr0) must have the «VLAN aware» checkbox ticked. - Now, for each individual VM or container, you can go to its
Hardwaretab, select the Network Device, and enter a VLAN Tag (e.g.,20).
That’s it! Proxmox will now automatically «tag» all traffic from that VM with the VLAN 20 ID. Your physical switch will then ensure this traffic can only go to other devices on VLAN 20.
Advanced Topic 2: An Introduction to NIC Bonding
A Linux Bond (also known as link aggregation) is a way to combine two or more physical network cards into a single, virtual one. This provides two main benefits:
- Redundancy: If one network card or cable fails, the connection remains active through the other one (failover).
- Increased Throughput: Depending on the mode, you can aggregate the bandwidth of multiple cards, for example, turning two 1Gbps NICs into a 2Gbps connection.
You can create a Bond directly in the Proxmox Network menu. You’ll need to choose a mode (e.g., balance-rr for load balancing, active-backup for failover) and select the physical NICs you want to include in the bond. You then create your main bridge (vmbr0) on top of this new bond0 interface instead of a single physical NIC.
Conclusion: You Are in Control
Understanding these three components—Bridges, VLANs, and Bonds—gives you complete control over your virtual network. You can create simple, flat networks or complex, segmented environments to match any need.
To see how this powerful networking fits into the bigger picture of managing a complete homelab, be sure to read our Ultimate Guide to Proxmox VE.