Introduction
Modern IT infrastructure thrives on automation, scalability, and repeatable configurations. Whether deploying at scale on-premises or in the cloud, administrators seek tools that streamline VM provisioning and post-deployment setup. This is where Cloud-Init steps in—a de-facto standard for early Linux VM configuration.
While Cloud-Init is popular in public cloud environments (like AWS EC2, Azure, Google Cloud), it integrates just as powerfully within private clouds and hypervisors—including Proxmox VE, a leading open-source virtualization platform. This article provides a deeply practical guide to integrating Cloud-Init into your Proxmox deployment, ensuring seamless initial configuration and lifecycle management for your virtual machines.
What is Cloud-Init?
Cloud-Init is an open-source tool that automates the initial configuration of Linux-based VMs. By processing metadata and user data supplied at launch, it can:
- Set up users and passwords
- Configure SSH keys and networking
- Install packages and run custom scripts on first boot
This drastically reduces manual labor and ensures consistent environments for developers, DevOps, and sysadmins alike.
Why Use Cloud-Init with Proxmox VE?
Proxmox Virtual Environment (PVE) is a robust platform for virtualizing servers based on KVM and LXC. While Proxmox makes VM lifecycle management easy, initial OS configuration still presents challenges—especially at scale. Integrating Cloud-Init delivers:
- Repeatable provisioning: VMs are configured identically every time
- Automation: No more tedious SSH setup or network hand-editing per VM
- Scalability: Effortlessly deploy dozens or hundreds of pre-configured machines
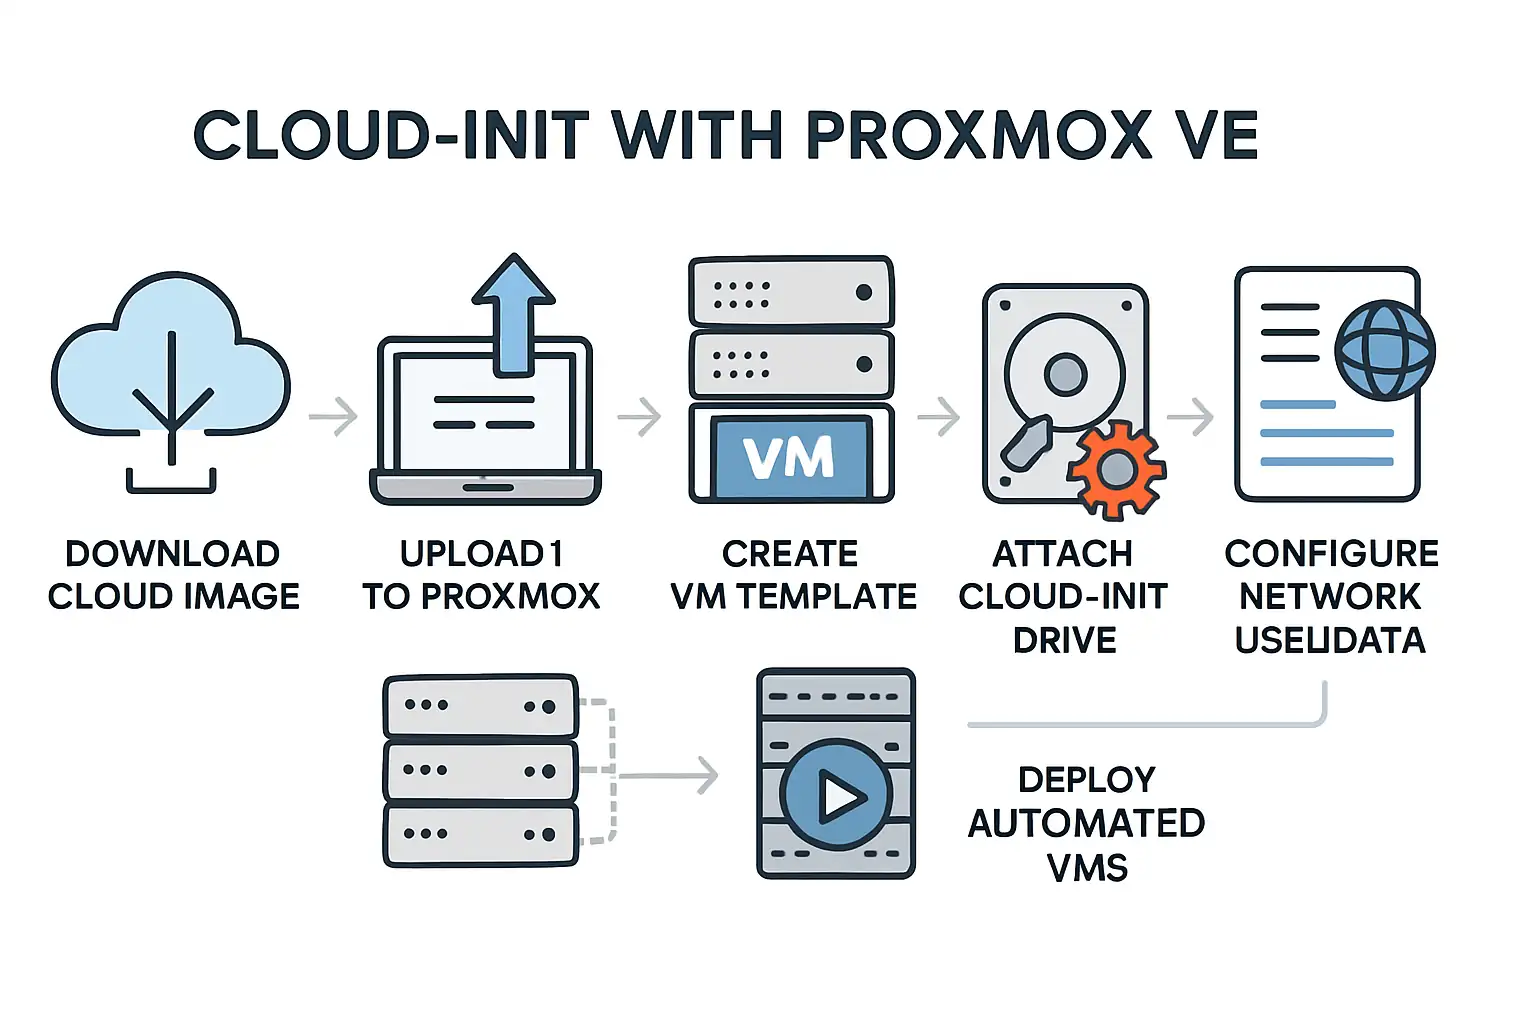
Step-by-Step: Preparing a Cloud-Init Ready VM Template in Proxmox VE
Here’s how to build a robust, scalable Cloud-Init workflow in Proxmox:
1. Download a Cloud-Init Compatible OS Image
Many Linux distributions publish “cloud images”—pre-built disk images with Cloud-Init pre-installed and ready.
Example: Download Ubuntu 22.04 Cloud Image
wget https://cloud-images.ubuntu.com/jammy/current/jammy-server-cloudimg-amd64.img
2. Upload the Image to Proxmox
Upload the downloaded image to your Proxmox node, typically to /var/lib/vz/template/qemu/ or via the web interface under your storage’s “ISO Images” or “Disk Images.”
3. Convert the Image to QCOW2 (if necessary)
Many images come in QCOW2 format, which Proxmox supports natively. If not, convert it:
qm importdisk <VM_ID> <image-file> <storage-name>
Example:
qm importdisk 9000 jammy-server-cloudimg-amd64.img local-lvm
4. Create a New VM as a Template
In the Proxmox web UI:
- Go to Create VM
- Assign a unique VM ID and a descriptive name (e.g.,
ubuntu-cloud-template) - Skip the OS ISO step, and do not attach a CD-ROM
- Configure CPU, RAM, and other hardware
- Do not add a disk manually; you’ll add it shortly
5. Attach the Imported Cloud Disk
- Go to the VM’s “Hardware” tab.
- Click “Add” → “Existing Disk,” and select the imported
.qcow2disk.
6. Enable the “Cloud-Init Drive”
- In the Hardware tab, click “Add” → “Cloud-Init drive”
- Choose your storage and confirm.
Proxmox automatically generates a special CD-ROM device for user-data. Cloud-Init reads from this device at boot.
7. Configure Network and User Data
- In VM settings, click “Cloud-Init”
- Set SSH keys, user name, passwords, IP configuration, etc.
8. Convert to Template
- Right-click the VM → “Convert to Template”
You now have a master Cloud-Init-ready template. All future clones can be fully auto-configured at first boot!
Advanced Tips and Best Practices
– Automating via CLI or Ansible
For large fleets, build VM templates and launches via the qm CLI or automation tools like Ansible and Terraform.
– Custom Scripts: User-Data Magic
You can inject powerful custom shell scripts via Cloud-Init’s user-data—install additional tools, bootstrap applications, and more.
– Version Control your Templates
Treat your template-building process and user-data payloads as infrastructure code. Use Git to track versions and changes.
Troubleshooting Common Pitfalls
- Cloud-Init Not Running?
Ensure the VM is based on a cloud image, not a generic install ISO. Check that a Cloud-Init disk is attached and properly prioritized in the boot order. - SSH Keys Not Working?
Double-check user-data syntax and ensure the correct public key is supplied via Proxmox. - Static Networking Fails?
Modern cloud images use Netplan (Ubuntu) or systemd-networkd—ensure your settings match the OS’s provisioning method.
Conclusion
By integrating Cloud-Init with Proxmox VE, you unlock enterprise-grade automation for your private cloud. Your VM lifecycle transforms—no more snowflake setups or deployment drudgery. Whether you’re orchestrating a dozen dev machines or hundreds of production servers, Cloud-Init is your force multiplier.
Take your infrastructure to the next level. Automate once, and let Proxmox + Cloud-Init do the heavy lifting—reliably, repeatably, at scale.