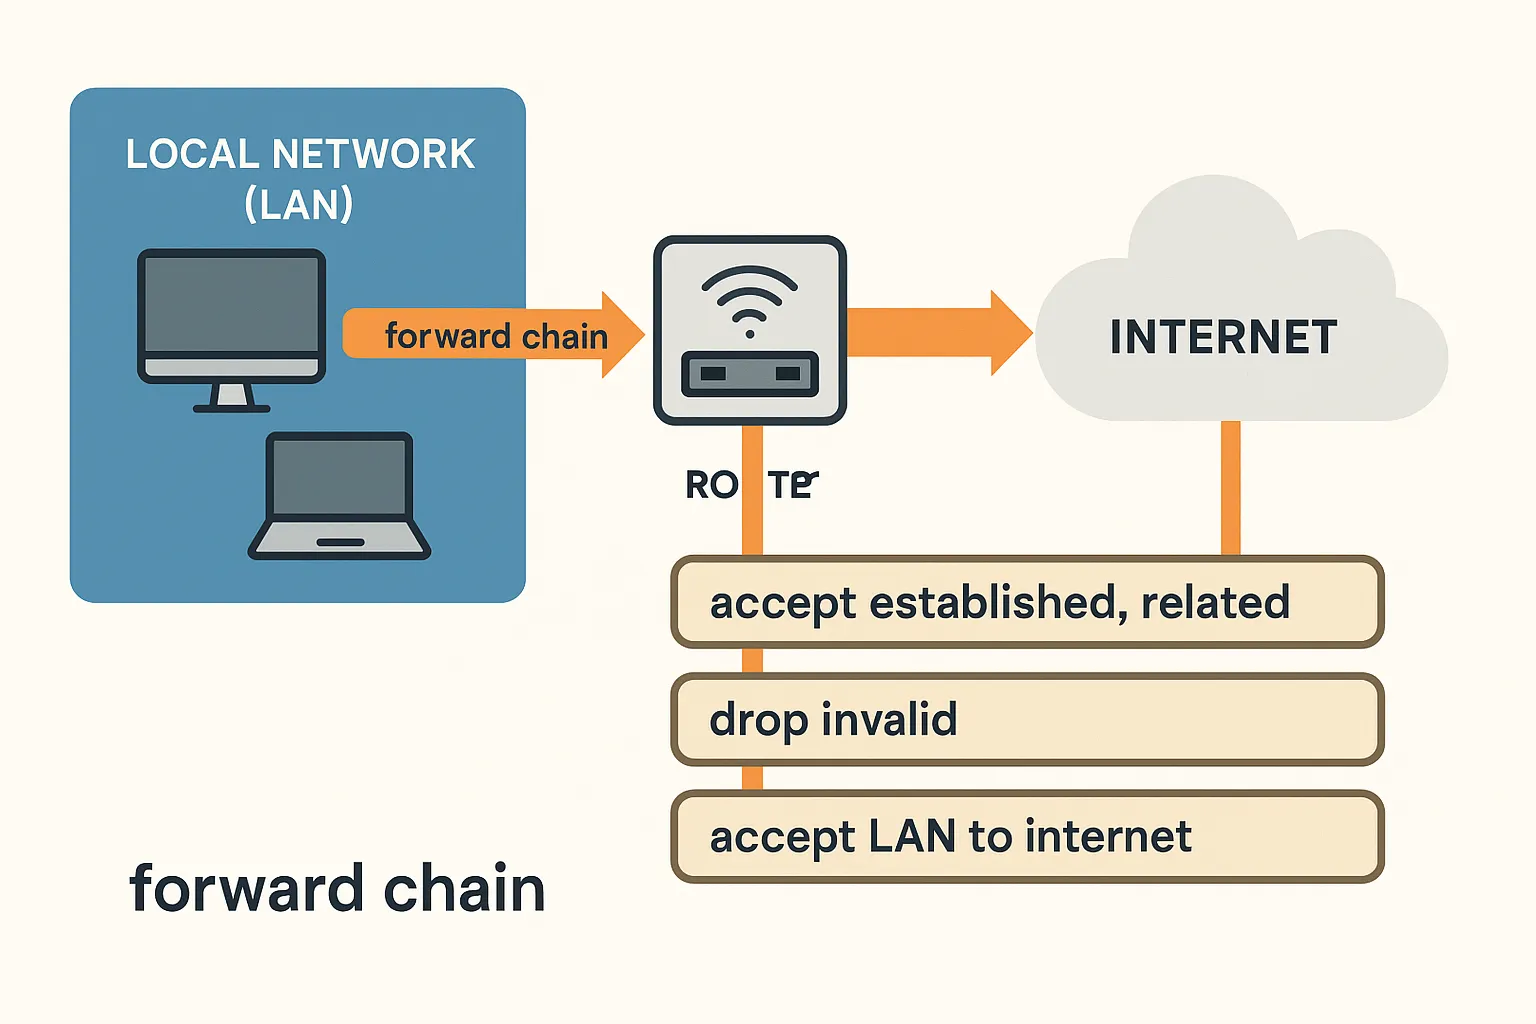
What Is the Forward Chain?
In MikroTik’s firewall, the forward chain handles traffic that passes through the router — not destined to it.
Examples:
- Your laptop accessing google.com
- A guest phone trying to stream Netflix
- A surveillance camera sending footage to the cloud
- A VPN client accessing a NAS in your LAN
If it goes through the router from one interface to another — it hits the
forwardchain.
🧠 Default MikroTik Behavior
By default, MikroTik allows everything in forward chain. That means:
- LAN can access WAN
- Devices in different subnets can talk to each other
- IoT devices can ping your servers
- Anyone on your guest Wi-Fi can scan your home PCs
Sounds bad? It is.
We’re going to change that.
🔒 Our Goal
- ✅ Allow LAN to go to the internet
- ✅ Block internet from accessing LAN (unsolicited)
- ✅ Segment guests, IoT, and sensitive networks
- ✅ Only allow specific cross-subnet traffic
- ✅ Detect and log suspicious or brute-force attempts
- ✅ Rate-limit scans and flooding
🧱 Step 1: Allow Established and Related Connections
We always start here:
/ip firewall filter
add chain=forward connection-state=established,related action=accept comment="Allow related & established"
This permits returning traffic like replies to web requests.
🔨 Step 2: Drop Invalid Connections
Packets without context or connection tracking often indicate garbage, malware, or errors:
/ip firewall filter
add chain=forward connection-state=invalid action=drop comment="Drop invalid"
🌐 Step 3: Allow LAN and VPN to Internet
We’ll assume you already have LAN_SUBNETS and VPN_SUBNETS address lists. You allow these to go out:
/ip firewall filter
add chain=forward src-address-list=LAN_SUBNETS out-interface-list=WAN action=accept comment="LAN to internet"
/ip firewall filter
add chain=forward src-address-list=VPN_SUBNETS out-interface-list=WAN action=accept comment="VPN to internet"
Optional: Instead of
out-interface-list=WAN, you can usedst-address-type=!localor other advanced filtering.
🚷 Step 4: Block Inter-Subnet Traffic (Optional)
If you don’t want your guest network to access your private network, drop or restrict it.
Example:
/ip firewall filter
add chain=forward src-address=192.168.20.0/24 dst-address=192.168.88.0/24 action=drop comment="Block Guest to LAN"
You can also use interface lists or VLANs here.
👀 Step 5: Log and Drop Everything Else
At the bottom of the chain, drop all other forward attempts. Optionally log them:
/ip firewall filter
add chain=forward log=yes log-prefix="Dropped FORWARD: " action=drop
Or just quietly drop:
/ip firewall filter
add chain=forward action=drop comment="Drop all else"
Pro Tip: If you’re running services that should be reachable (e.g., port forwards), you’ll create exceptions before this drop rule.
🔄 Optional: Allow Specific Internal Flows
For example, if a VPN client needs to reach a NAS in your LAN:
/ip firewall filter
add chain=forward src-address=10.10.10.0/24 dst-address=192.168.88.100 protocol=tcp dst-port=445 action=accept comment="VPN to NAS (SMB)"
Or allow ICMP (ping) between LAN and VPN:
/ip firewall filter
add chain=forward src-address-list=VPN_SUBNETS dst-address-list=LAN_SUBNETS protocol=icmp action=accept comment="VPN ping LAN"
💡 Forward Chain Example (Clean & Secure)
/ip firewall filter
add chain=forward connection-state=established,related action=accept comment="Allow known connections"
add chain=forward connection-state=invalid action=drop comment="Drop invalid"

add chain=forward src-address-list=LAN_SUBNETS out-interface-list=WAN action=accept comment="LAN internet"
add chain=forward src-address-list=VPN_SUBNETS out-interface-list=WAN action=accept comment="VPN internet"

add chain=forward src-address=192.168.20.0/24 dst-address=192.168.88.0/24 action=drop comment="Guest to LAN — blocked"

add chain=forward action=drop comment="Drop everything else"
✅ Summary
✔ You’ve secured the forward chain
✔ You allowed legitimate traffic to pass
✔ Blocked inter-subnet traffic where needed
✔ Dropped unknown or invalid connections
✔ Laid the groundwork for firewall segmentation